With two seasons of The Block, their own renovation show and countless real-life renovation projects under their tool belt, Ronne and Georgia Caceras know a thing or two about flipping a space. Indoors and out, this dynamic duo are double trouble in the design stakes – with Ronnie’s tradie prowess putting into action anything designer Georgia can dream up – it’s really a winning combination! With a classic design style that leans contemporary, the couple are transforming their own home in WA, one project at a time. “It’s still very much a work in progress!” says Georgia.
“I always like to introduce a subtle contemporary edge, so spaces feel fresh rather than predictable.”
Georgia
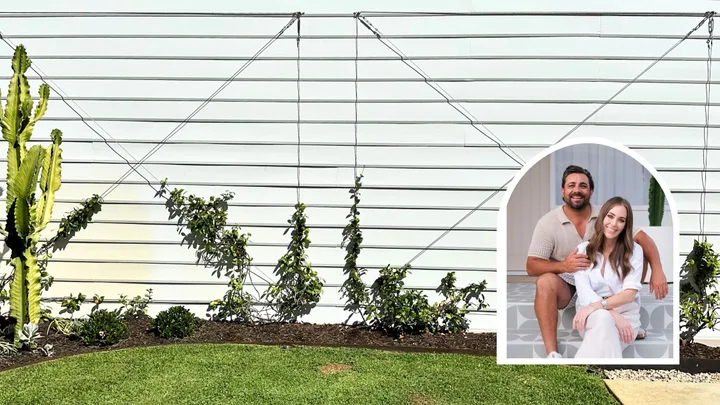
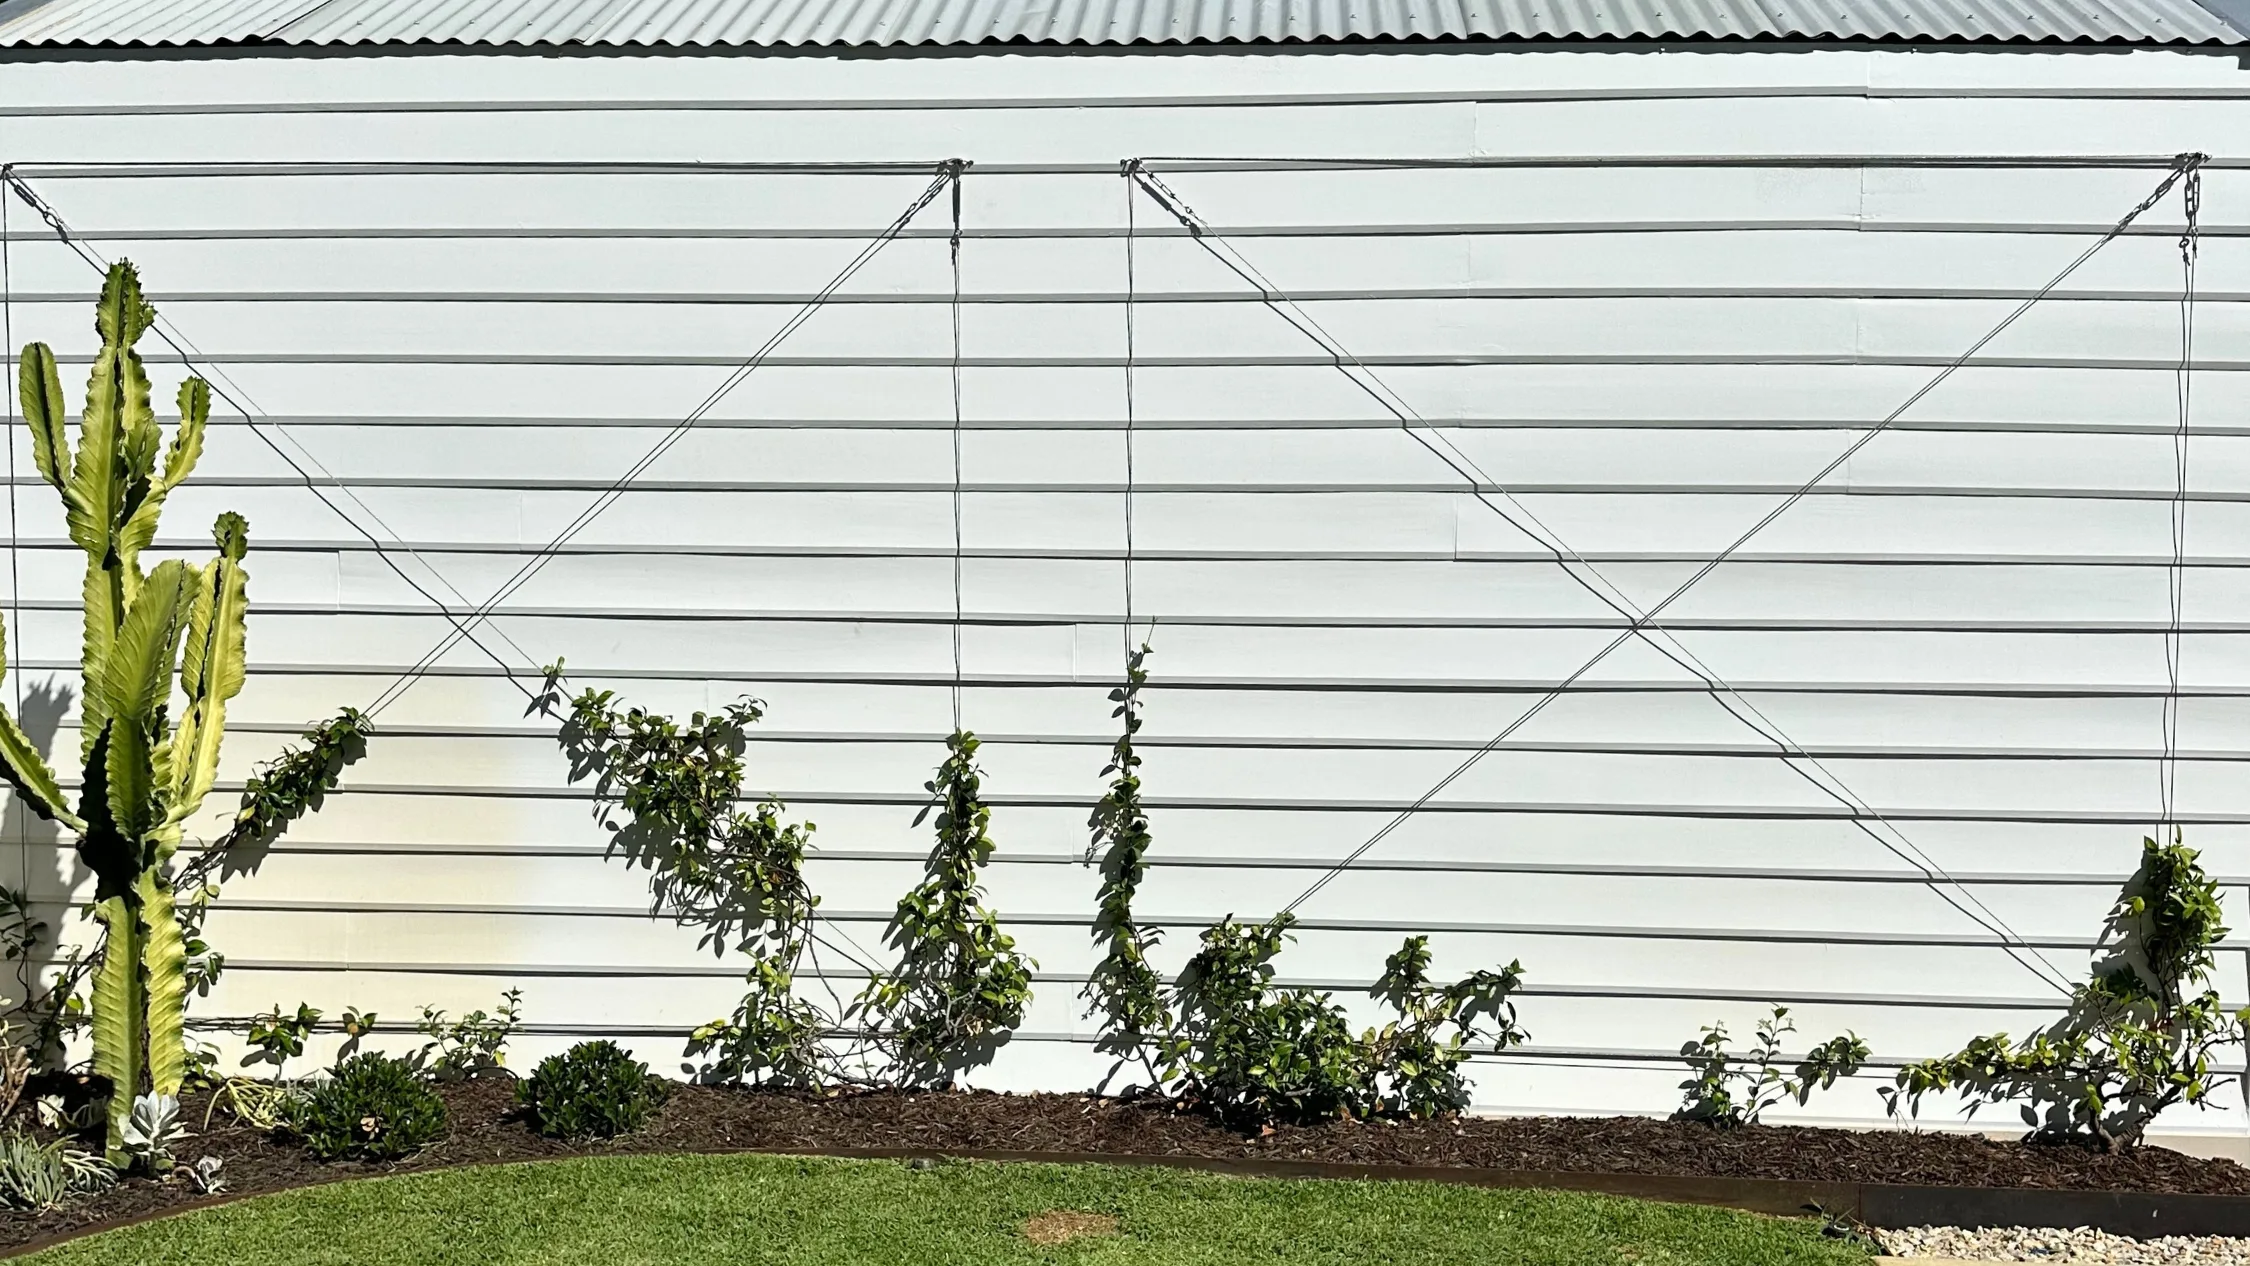
Case in point: Their recent star jasmine trellis project was unveiled on Instagram. Ronnie turned an unassuming wall into a vertical garden resplendent with the season’s bounty of fragrance and sweet white flowers. Making the most of an unused area in their backyard by relocating potted mature jasmine plants to a dedicated climbing structure, with impressive results. “We already have jasmine growing on a trellis elsewhere in our home,” says Georgia. “So bringing it into this space felt like a natural extension of the design. It creates a nice connection point between different areas and was also a simple, effective way to quickly transform what was otherwise a fairly flat, boring wall. I absolutely love it. It instantly elevates the space and adds softness, texture, and greenery without feeling overdone.”

“As it grows, it’s only going to get better, which is my favourite kind of design decision.”
Georgia
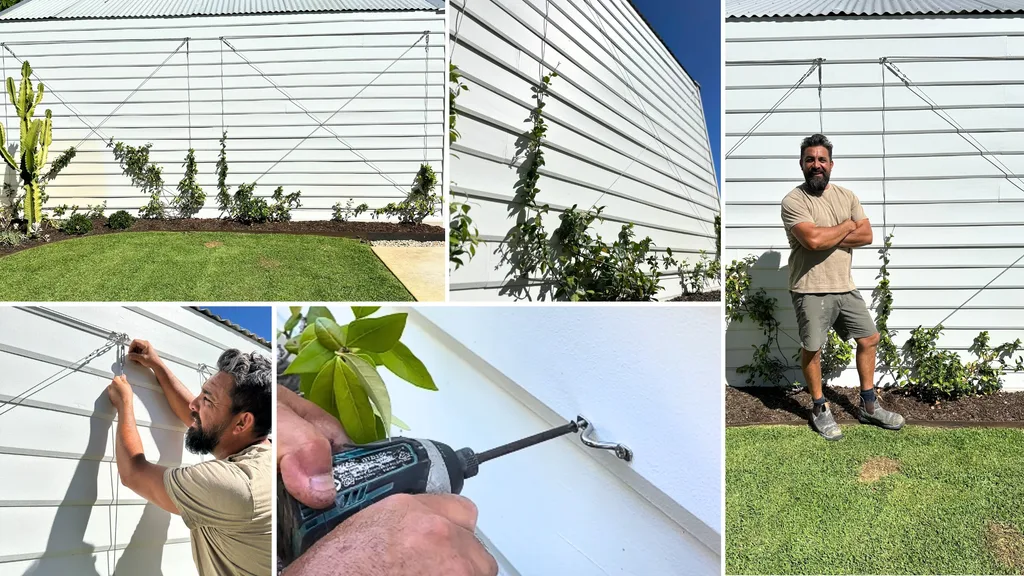
The best part? Ronnie outlines the procedure step-by-step on Instagram, showing that anyone can achieve this look in their own home and, for budding gardeners, it’s just the ticket you need to get busy and tackle this gardening project with new confidence, taking on board all the tips Ronnie and Georgia can hand out. The biggest learning? “Planning is everything,” says Georgia. “Knowing your wall dimensions, trellis spacing and plant placement beforehand makes the install much smoother.”
What kind of wall can you attach a trellis to?
“Star jasmine can be trained on pretty much any wall type,” says Georgia. “We’ve fixed trellis to weatherboard, brick and rendered walls. You just need to adjust the fixing method to suit the surface. For example, when fixing into brick, you’ll need wall plugs, whereas timber framing or weatherboard uses screws.


Where should you plant a star jasmine trellis in your garden?
The correct placement is also key, says Georgia. “They perform best in full sun to part shade. The more sun, the thicker the growth and flowering and of course, consistent water whilst establishing is a must!”
“Thinking about long term growth from the start also helps ensure the feature looks balanced not just now, but well into the future.”
Georgia
How to build a star jasmine trellis (the Rondog way)
What you will need
- Stainless steel wire 3.2mm (Ronnie used 17m of wire per square = total 34m)
- Stainless steel turn buckles 6mm MB316
- Nickel-plated copper swages 3.2mm
- Wire cutters
- Wire crimpers
- Eye straps
- Stainless steel screws
Step 1
Prepare the soil and plant potted jasmine plants approximately 60cm apart along your garden wall. “We wanted ours to have dense coverage and grow quickly,” says Georgia. “If patience is your virtue, 1m apart is pretty standard.”
Step 2
Screw eye straps to the wall approximately 2m apart at the top and bottom of the wall. Ronnie custom-designed his to suit the wall so each square is 2.2m x 2.6m. “The great thing about star jasmine on a trellis is that it’s so flexible,” says Georgia. “You can adjust the size or pattern to suit any wall, big or small and still get the same great, lush result.”
Step 3
Feed stainless steel wire through one side of the copper swage, then pass the wire through the top eye strap on the wall, then back into the other side of the swage. Pull tight along length and position swage to minimise the size of the loop, then crimp swage with crimper to secure.
Tip: As a guide, for each square, Ronnie used approx. 17m of wire. With two squares, he used 34m all up.
Step 4
On reaching the final side of the square, take the turnbuckle and feed the stainless steel wire through the closed loop end, then crimp to secure (see Step 3). Hook the open end of the turnbuckle into the first eye strap you started with to form a wire square. Trim excess wire and tighten the turnbuckle by rotating the tension wires.
Step 5
Repeat Steps 3 & 4 using the same eye straps and turnbuckles to install 2 cross-wires, corner-to-corner in each square. Tip: Leave a small amount of movement to support vines without straining attachment points.
Step 6
Train stems and tendrils of the star jasmine plants along the wires by gently weaving them in and out of the wire. Water plants well.
