 Circa
Circa
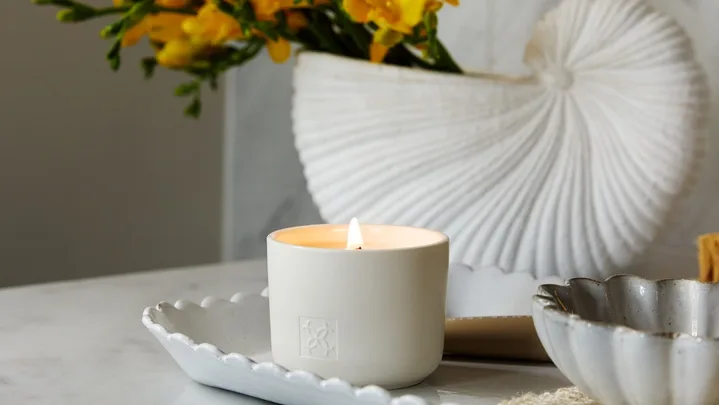
Nothing sets the mood quite like the warm glow of candlelight. It transforms a space, adding ambience, a welcoming fragrance, and a sense of calm that encourages you to slow down and savour the moment. But here’s the question: are you really getting the most out of your candles?
Even the most luxurious candle can underperform if burned incorrectly, leaving wasted wax, uneven flames, and a shorter lifespan than intended. The good news? A few simple, insider tricks can help you enjoy every last drop of wax, extend burn time, and keep your candles looking beautiful from first light to final flicker.
Aficionados know that you get what you pay for when buying candles. The best candles are often the priciest. The best luxury candles reflect the raw materials, time and skill that have all come together to make your home smell amazing. And, if you’ve spent a pretty penny on your candle collection, it’s only natural to want to make each candle last longer. In this guide, we’ll reveal the five most common mistakes people make when burning candles, share how to avoid them and help you elevate your candle game and make the most of every glow.

1. Not setting the memory of your candle
A common mistake is to not let the candle burn for long enough during the first burn.
The size of the wax pool during the first burn determines the life of the candle; subsequent burns won’t melt the wax beyond the initial wax pool, so if it didn’t melt close enough to the edge of the candle, tunnelling (when a candle burns hollow, i.e. leaves a thick, unused mantle or rim) might occur.
Tunnelling can be avoided by ensuring the initial burn is long enough to melt the candle to the edge. This is called ‘setting the memory’ of the candle.
What to do instead: As a rule of thumb, burn a new candle for 1 hour per 2.5cm (1 inch) in diameter. So for a 7.5cm (3-inch) diameter candle, the initial burn time should be at least 3 hours.
How to fix a candle with a tunnel of wasted wax
When you don’t “set the memory” of a candle it creates a tunnel in the wax, leaving a rim of thick wax behind. No matter how much you try, it doesn’t ever melt and shortens the life of your candle. How do you fix a candle that has wasted wax that won’t melt? We have the solution!
Place a collar of aluminium foil inside the top rim of the candle vessel. This concentrates the heat and helps to melt the wax down from the sides of the candle to meet the level of the wick again. Be sure to burn the candle for at least three to four hours, and, while it may not be as pretty burning the candle without the foil, you’ll find all that residual wax slowly melts down. It’s a good excuse to enjoy your candle when no-one else is looking. Then, allow the candle to cool fully and you can start again with your next burn!
More candle ideas


2. Not trimming the wick
A wick that is too long can cause a candle to start smoking. Keep your wick trimmed at all times to create a calm, steady flame to aid a balanced burn and efficiently pull up the right amount of wax for combustion. A wick that is too long won’t be able to draw wax all the way to the top, and the wick itself will start to burn, causing it to smoke.
What to do instead: Before lighting, trim the wick to 6mm (1/4 inch) and remove any wick debris, which can disturb the burning of the candle.


3. Using the wrong container
Candles are often used with other home decor to amplify the effect. Placing a candle inside a lantern, container or vase can extend your decorative theme and protect the flame against breezes, but be sure to use the right size container. If the vase is too enclosed or too small for the candle, it may restrict airflow, causing the candle to flicker and smoke.
What to do instead: Use a container that is open on both sides (top and bottom) so hot air can rise out and cold air can get sucked in from the bottom, or choose a container large enough to allow for roughly half the candle diameter of space between the candle and the vase edge. For example, a 7cm candle should have at least 3.5cm of space between the candle and the edge of the container.

4. Placing the candle too close to draughts
A candle caught in a draught loses its elegance—its flame flickers, smoke curls, and in a strong breeze, molten wax begins to cascade.
What to do instead: To avoid this, eliminate the source of the draught, move the candle out of the breeze or shield the candle from the draught inside a lantern.

5. Placing candles too closely together
A setup with multiple candles in a variety of sizes can look beautiful, yet make sure the distance between the candles is large enough to avoid irregular melting, warping, and ultimately dripping.
What to do instead: Place lit candles at least 10cm (3 inches) apart to avoid melting and warping due to heat from neighbouring candles.
